

Way back in 2018 I posted about what I was looking for in a new bikepacking bike. It took a while, but after a few false starts I have a new frame I’m building up. I’ll be documenting this build over a few posts to spread out the information and keep it organized. This initial post will discuss what I got, why I got it and what’s next.
Prior to ordering a custom frame from Peter at Daambuilt I attempted to order two different production frames and ran into snags both times that stopped me. After the second failure I took it as a sign that I was meant to get a custom frame and since it was my 50th birthday this year that seemed like a fitting birthday present to myself. Clearly this was a sign from the Bike Gods!

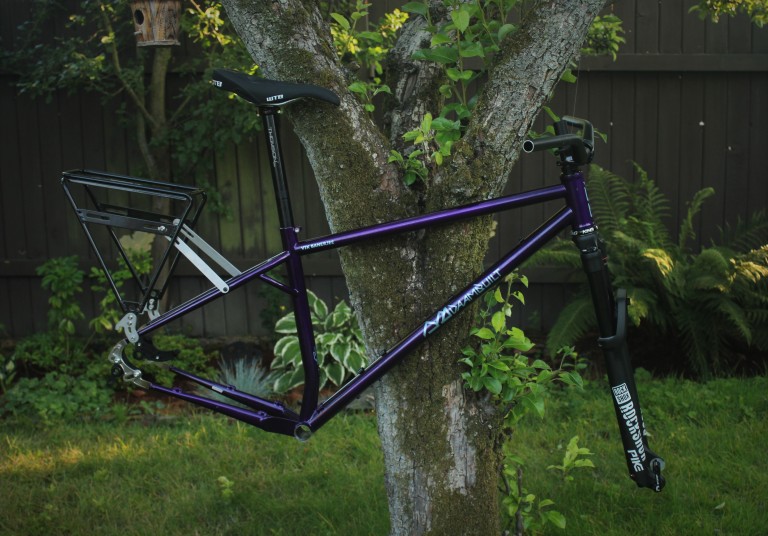
It’s no secret that I like the 29+ wheel/tire size for bikepacking and since I was going custom I made sure I could fit the big rubber in this frame. I really have loved a lot about my Surly Krampus so I took a lot of inspiration from it, but wanted to update the geometry and features of that utilitarian 2013 frame. Hence calling the new bike The Mega Krampus. It’s a Krampus, but more…a lot more…Mega more!
One of my goals these days is to have versatile bikes that are compatible across the fleet. This means fewer bikes that can fill multiple roles and that can share a lot of parts. Even at peak bikepack I’m only going to tour a few weeks a year. So the Mega Krampus also needs to be good at less gnarly trail riding, gravel grinding and urban assault riding. Basically everything this side of smashing the steepest chunkiest terrain that I will leave to my full suspension mountain bike.

Peter had built a fine machine for Skyler that I knew worked very well. That gave me a lot of confidence in going the custom route since he’d have thought about and fabricated many of the details that were important to me. I wanted a slacker headtube angle with a taller fork, a slacker seattube angle and room for bigger wheels/tires than Skyler’s bike so we played around with the design a while until we were happy with the result.
Main design features:
- Frame material: Steel
- Stiffness: lively for my ~195lbs riding weight and minimal cargo
- Reach: ~18″
- Stack: ~26.2″
- Chainstays: ~16.7″ at shortest setting
- Headtube Angle: ~65 deg unsagged with a 140mm fork
- Seatube Angle: 73.5 deg unsagged
- BB Height: ~12.4″ unsagged with a 29 x 2.6″ tire
- Wheel Size: 29 x 2.6″ – 3.0″
- Fork: 140mm
- BB Type: 73mm threaded
- Hubs: 110mm front and 148mm rear
- Dropper: 150-175mm with stealth routing – 30.9mm
- Water bottle mounts on top of and under DT
- Wheels swappable with other bike[s] in fleet
- Dropper swappable with other bike[s] in fleet
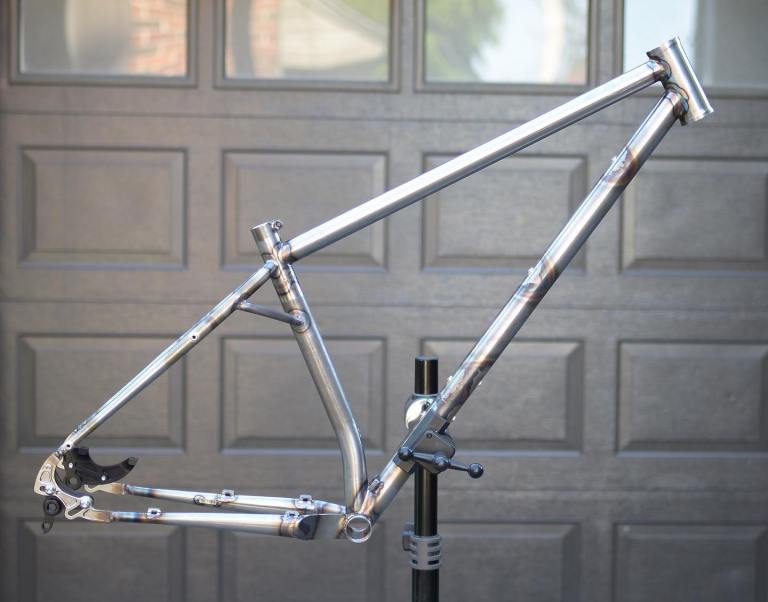
- Rocker dropouts for adjustable CS length and SS setup
- External cable routing except dropper
- Top tube height as high as possible to maximize space inside frame for frame bag
- Portage handle for easy carrying over obstacles
- Integrated seattube clamp
- Rack mounts for my OMM Sherpa rack
- Mudhugger rear fender compatible
- Works Component adjustable headset compatible
Opinions will vary no doubt, but to me this ^^^ represents a nice mix of versatility and capability from mountain bike trail to gravel road, whether unloaded or loaded down with ultralight camping gear. With fenders and a rear rack the Mega Krampus will also be able to prowl the urban jungle with aplomb hunting groceries when needed.

I’m not quite ready to cull the herd so aggressively, but I would like to have all my bike missions covered by the Mega Krampus and a full-suspension mountain bike like my Guerrilla Gravity Smash. Since the original Swamp Green Surly Krampus is paid for and a perfect machine to lock up outside a pub or grocery store without worrying she will live on for the foreseeable future.
Frame Flex
Having a hardtail frame with the right balance of flex is pretty crucial to an enjoyable ride. Too much flex and it’s a noodle that’s scary to ride and too little it feels dead leading to low enthusiasm to hammer the pedals. The right amount of flex gives you that fun springy feeling that makes you want to attack the terrain and keep pushing. Bicycle Quaterly calls this “planning”. Production frames typically err on the side of too stiff for a lot of reasons. They have to suit riders of a wide variety of weights and power outputs so they build to be safe for a 250+lb rider that can hammer, which means someone lighter and less powerful ends up with a frame that’s overbuilt for them. Going custom allowed me to control that aspect of the design and shoot for a level of flex that was appropriate for me. I got a taste for this when I had my semi-custom Boulder Bicycle rando machine. Once you have a frame that planes it’s pretty addictive and you don’t want one that doesn’t.

140mm Fork
Unlike full suspension bikes hardtails pivot around the rear axle when the fork compresses. This steepens the geo significantly and needs to be accounted for in the design. The longer the fork the more the geo changes with sag. Beyond that I don’t see a point in running a huge fork up front with a rigid back end. So I settled on 140mm and ~65 deg headtube angle [unsagged], which should be plenty for trail riding and not be too much overkill when bikepacking. I did select a 42mm low offset fork to shorten the wheelbase and keep the front wheel weighted a bit more easily.
Note the frame is compatible with a Works Component headset that can be had in 0.5, 1, 1.5 and 2 deg adjustment increments if I want to tweak the front end geometry later on. The Pike can also be adjusted from 130mm to 150mm travel with a new airshaft if that became desirable.

Adjustable Chainstays
I decided on swinging dropouts so that I could adjust the chainstay length to tune the ride quality and for varying my tire size between 2.6″ to 3.0″. It also will allow me to run the bike as a single speed either intentionally if I am feeling like a hardman or as a backcountry hack if I damage my derailleur. The shortest position is ~16.7″ and the longest position is ~17.4″. That’s not crazy short or crazy long for a 29+ capable frame, but I think it will be a useful range of adjustment.
Dropper Compatibility with a Seatbag
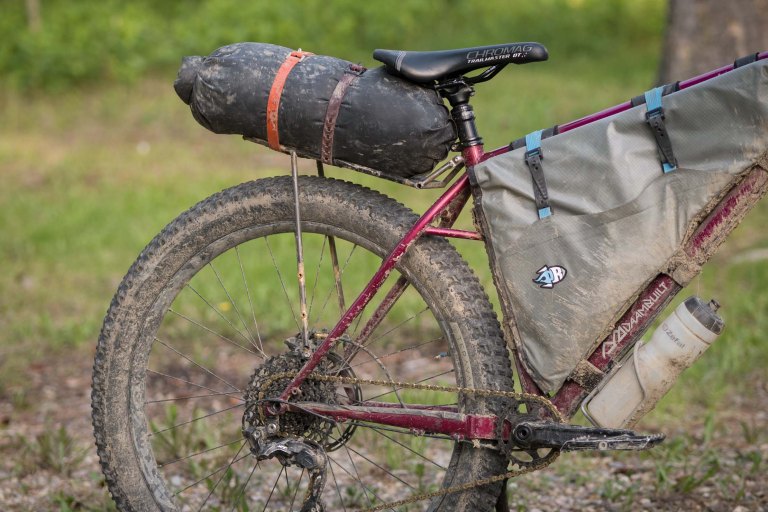
One thing I really wanted on an updated bikepacking bike was a dropper. That required a larger 30.9mm seattube to get lots of quality dropper choices as well as a stealth routing port in the seattube. We also had to consider the length of seattube that would allow a decent dropper adjustment range [150-175mm]. Beyond that a bikepacking bike needs to haul gear and a seatbag is a common and convenient way to do so. The problem is a seatbag plus big 29er rubber plus a dropper is not really practical. When you lower the saddle the seatbag and the tire want to be in the same space. There are some seatbag solutions that attempt to mitigate this issue, but I figured since we are doing a custom bike let’s totally solve it.

The solution is to use a lightweight rear rack and strap the contents of the seatbag to the top of the rear rack in a dry bag. The benefits are a very strong/stiff way to mount my gear behind the saddle that does not interfere with full use of the dropper or my ability to move backwards on the bike when the terrain gets steep and gnarly. Another benefit is that a rear rack can be used with normal panniers in town or on a non-technical tour to haul more stuff, which enhances the utility of the bike a lot. The downside is hauling around some extra weight vs. a seatbag. That seems like a reasonable trade off.
Peter offered to make me a custom super light/minimal rack like the one shown on Skler’s bike. I declined because I already owned a nice light Old Man Mountain Sherpa rack and spending more money for a marginal gain didn’t make sense. Additionally I can always get a custom rack made later if I decide it’s that important to me.

Fenders
I made sure the frame was compatible with a Mudhugger rear fender [no braze ons on the top of the upper seatstays]. Wet weather riding without a rear fender sucks and I’m not going to do that again. The current setup allows me to run the rear rack or a rear Mudhugger since the rear rack acts like a partial fender on its own. If I decide I want to run both the Mudhugger and a rear rack I’ll just swap in taller rack adapters to get the needed clearance.
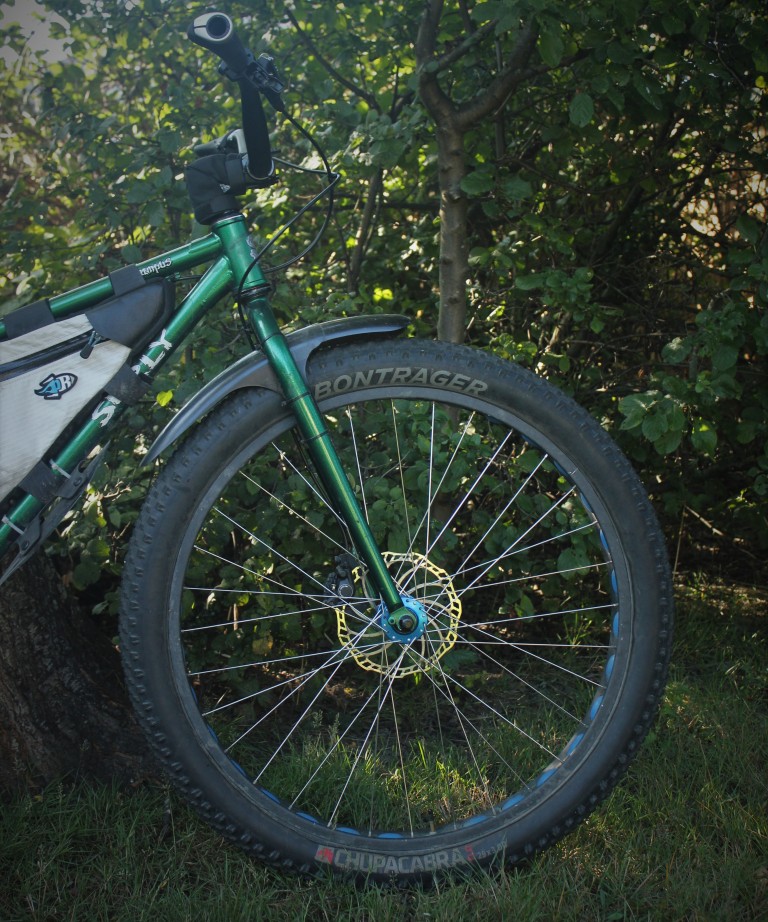
There is room inside the fork for a Mudhugger front fender or a smaller plastic sheet fender with 2.6″ to 2.8″ tires. I’m not sure there is room for a full 3.0″ tire in the fork plus a fender. The reason being I bought the fork when I thought I was getting a production frame that fit a maximum 2.6″ tire in the back so I didn’t really worry about 29+ compatibility. I’ll see what the clearance looks like down the road when I put a 3.0″ front tire on and I may have to whip out the dremel tool to “create” the clearance I need. For sure I won’t be giving up on a front fender to run a 29+ tire.

Working with Daambuilt on a custom frame…
Peter was very easy to work with. We had been discussing a 29er/29+ hardtail sporadically for over 2 years, but I only made the firm decision for a custom bike this Jan 2019. Since we had already discussed a lot of the issues in the past and he had built a similar rig for Skyler we were mostly left to go over the finer details. That still took some time and effort. Custom bikes are great in that you can ask for anything you want, but it does take a lot of time, thought and attention to get those details sorted out. Some people will love that process and some people won’t.
Custom also takes time. Peter does not have an insane wait list, but we started in Jan and I got the bike in July. To be fair it took me time to make some choices and I was not rushing the project along, but no mater what a custom bike will take a moment. If you are in a rush or super impatient this may not work for you.

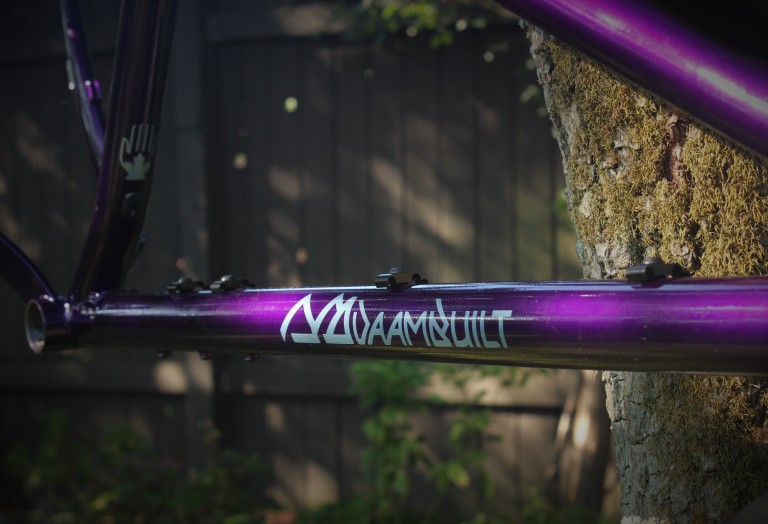
Frame Colour and What’s Next
The Mega Krampus frame is in and looks great. I had intended to go with a green finish in homage to the original Swamp Green Krampus, but my stoke for green was not as strong as I had thought. So I switched to purple partially because I’ve never had a purple bike so that’s fresh and partialy because the current Surly Krampus comes in a nice purple colour so the homage lives on. I’m going to start the build this weekend. I plan to use a lot of existing parts I have. That will clear out the spares bin a bit and keep costs down. My next post will cover the build spec. Stay tuned.

NSMB had a nice article about Peter and Daambuilt you can read here.
If you have any questions about the design choices we made for the Mega Krampus leave a comment and I’ll let you know what we were thinking.

Do you find that the rear rack “stiffens” the frame?
Beautiful bike. (What is the paint color?)
LikeLike
Hi Jeff. I’m still waiting on a couple parts to come in so I haven’t ridden it yet. I’ve used this rack on other bikes though and it’s had no impact on how stiff the frame felt. It doesn’t add any structure in the way the rider loads the frame.
I don’t know what purple that is. I picked a purple colour from Prismatic Powders: https://www.prismaticpowders.com/shop/powder-coating-colors/PPB-6559/chandler-purple
But, I don’t know that is what ended up on the bike or something somewhat close that the powder coating company had on hand.
LikeLike
Do you know what diameter and thickness was used for the top and down tubes?
Probably not a 25.4 x 7/4/7 top tube…
LikeLike
Hi Eric,
I don’t know, but I am sure Peter would be happy to share that info: peter@daambuilt.com
Vik
LikeLike